14 October 2013

Sustainable Food Center


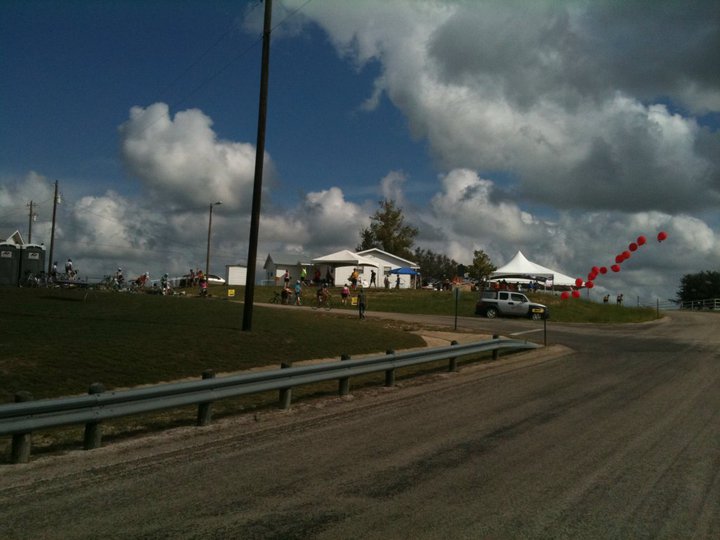
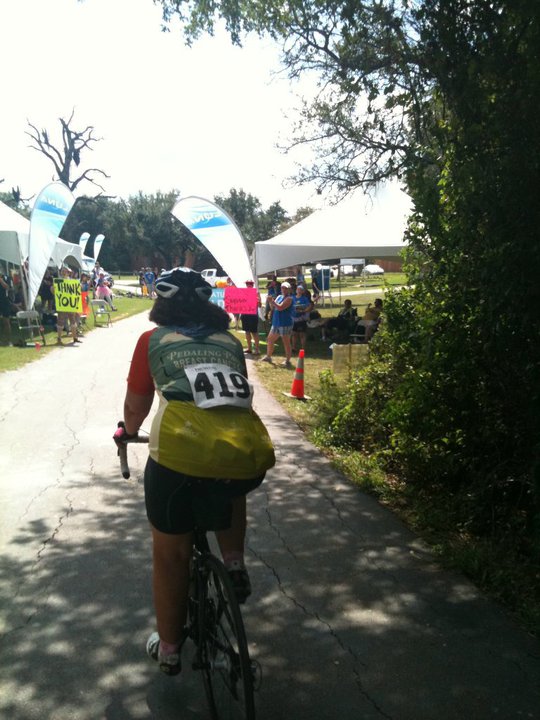
Mamma Jamma Beneficiary #5 - This is Why I Ride:

One of the Beneficiaries Mamma Jamma riders love raising money for is The Sustainable Food Center. They provide the only cooking and nutrition class that promotes sustainable, healthy food to promote recovery & prevent recurrence for cancer survivors. The Happy Kitchen/La Cocina Allegre classes are taught in both English and Spanish by trained community-based facilitators.
  
The Happy Kitchen Class
According to the American Cancer Society,  at least one-third of annual cancer deaths in the U.S. are due to dietary factors.  Obesity or a high Body Mass Index is just one of the risk factors for developing breast cancer. By learning how to properly shop, cook and eat healthy foods, survivors can prevent recurrence for themselves, improve their recovery from treatment, and prevent future cases among family members who also learn how to live a healthy lifestyle. 

The Happy Kitchen/La Cocina Alegre classes are 6 weeks long with 9 hours of class time. They include the Happy Kitchen Cookbook, fresh seasonal recipes and groceries from the classes so the recipes can be made again at the participant's home. The classes are offered both for free and for a fee. Free classes are grant-funded and include the food made at the workshop, recipes, and class materials. Money raised by the Texas Mamma Jamma Ride helps fund these vital workshops.

La Cocina Allegre

Your Donated $$ Put to Good Use:

$15    -  the cost of a cookbook for one survivor
$20    -  the cost of "recipe" groceries for 1 survivor, per 6 week class
$50    -  the cost of 1 instructor for 1 class
$75    -  the cost of educational materials for 1 six week class - serving 25 survivors
$165  -  the cost of a life-changing six-week course for 1 survivor. (This covers groceries to prepare the recipes at home with the rest of the survivor's family, 9 hours of instruction, multiple nutritional handouts and a cookbook.) 

Check out one of the classes:


The Happy Kitchen, a program of Sustainable Food Center from Sustainable Food Center on Vimeo.

The Sustainable Food Center 
is just one of the 10 Beneficiaries of the
THIS, is why I ride

You can support my fundraising efforts here


11 December 2012

A Tribute to Sheila...


Four years ago today, I was in Houston for my mastectomy that removed that nasty Breast Cancer from my body. As far as I know, I am still cancer free & I should be celebrating this CANCERVERSARY but my heart is not in it. I just found out that my friend Sheila passed away yesterday from this @%&*#@! disease. She lived in Illinois, and we only met once for dinner in San Antonio, but we drew close because of an online friendship at the Her2 Support Forum. Sheila was one of those special people who puts others needs before her own. Even though she was dealing with terrible burdens herself, she always lifted up and encouraged those on the forum that were dealing with much less.

MY DEAR FRIEND SHEILA
HOW WE "MET":

In January 2009, just before starting my own chemotherapy, I spent one evening on the HER2 Forum. Most everyone that posts has a "signature" - a description of their unique cancer story and I was searching for others with a similar diagnosis to mine...how were they doing...will my future be similar to theirs? That's what you do when you learn you have joined the Cancer Club - you look for a crystal ball. Immediately, Sheila's signature caught my attention. She was diagnosed in 2002, and seemed to be one of the "lucky ones". Her cancer was caught early in her left breast by mammogram ...Stage 1...0.7 cm (barely 1/4 of an inch)...no lymph nodes were involved. Okay I thought, my tumor was 2 cm with no lymph node involvement, found the same way and in the same breast. Sheila had a mastectomy and that should have been the end of it. I also had a mastectomy, BUT WAIT...SHE RECURRED 16 MONTHS LATER?? What happened?? No Herceptin?? Checking the dates, and doing a bit of research, I learned that in 2002, you had to be Stage 4 to get Herceptin. It wouldn't be until 2008 (wow, just months before I was diagnosed), and only after many clinical trials later that the FDA would approve Herceptin for Neo-Adjuvant treatment - meaning it was available for early stage patients to prevent recurrence rather than treat it!! Approved for people like me...

That night in 2009, I had been dreading my chemo and feeling sorry for myself. Reading the rest of Sheila's signature (I have copied it below, with her prior permission), I couldn't believe all that she had been through. I realized that because the fate that my cancer was diagnosed 6 1/2 years later than hers, my life might just have a different outcome...and I cried for Sheila. It was a shock and my attitude did a 180. Friends have told me they couldn't believe how well I handled my cancer. What they didn't know was that Sheila was my secret weapon.  From that day forward, I felt a special connection with her and we became friends. I consider it a blessing that I was able to meet her in person at a dinner in San Antonio when she was there for the Breast Cancer Symposium. I sat next to her and we had a great evening filled with laughter and great stories. I was able to tell her how much she meant to me and how she unknowingly helped me endure my treatment.

For 2 months I have known this day was coming. Sheila's body could not tolerate any more punishment and she entered into hospice in early October. That didn't stop me from hoping for a miracle though. This has been a very hard year. Sheila has joined Brenda and Courtney, among other HER2 angels this year. These women leave a legacy behind to be admired. I have a 10% chance that my cancer will recur. This statistic equals what I was told before my original biopsy...I had a 10% chance that the microcalcifications would be cancerous. I do not know if I will recur, but if I do, these women will once again be my mentors by the way they lived their lives. I only hope that I will be as strong as they were. 

Brenda and Sheila
SHEILA'S HER2 "SIGNATURE" :

"Be kinder than necessary, for everyone you meet
is fighting some kind of battle." 
(Sheila's favorite quote)

Hugs & Blessings,
Sheila
Diagnosed at age 49.99999 2/21/2002 via Mammography (Calcifications) 
Core Biopsy 2/22/02
Left Mastectomy 2/25/2002
Stage 1, 0.7cm IDC, Node Neg from 19 nodes Her2+++ ER PR Neg
6/2003 Reconstruction W/ Tissue Expander, Silicone Implant 
9/2003 Stage IV with Mets to Supraclavicular nodes
9/2003 Began Herceptin every 3 weeks
3/2006 Xeloda 2500mg/Herceptin for recurrence to neck nodes
3/2007 Added back the Xeloda with Herceptin for continued mets to nodes
5/2007 Taken Off Xeloda, no longer working
6/14/07 Taxol/Herceptin/Avastin
3/26 - 5/28/08 Taxol Holiday Whopeeeeeeeee
5/29/08 Back on Taxol w Herceptin q 2 weeks
4/2009 Progression on Taxol & Paralyzed L Vocal Cord from Nodes Pressing on Nerve
5/2009 Begin Rx with Navelbine/Herceptin 
11/09 Progression on Navelbine
Fought for and started Tykerb/Herceptin...nodes are melting!!!!!
2/2010 Back to Avastin/Herceptin
5/2010 Switched to Metronomic Chemo with Herceptin...Cytoxan and Methotrexate
Pericardial Window Surgery to Drain Pericardial Effusion
7/2010 Back to walking a mile a day...YEAH!!!!
9/2010 Nodes are back with a vengence in neck
Qualified for TDM-1 EAP
10/6/10 Begin my miracle drug, TDM-1
Mixed response, shrinking internal nodes, progression skin mets after 3 treatments
12/6/10 Started Halaven (Eribulen) /Herceptin excellent results in 2 treatments 
2/2011 I CELEBRATE my 9 YEAR MARK!!!!!!!!!!!!!
7/5/11 begin Gemzar /Herceptin for node progression 
2/8/2012 Gemzar stopped, Continue Herceptin
2/20/2012 Begin Tomo Radiation to Neck Nodes
2/21/2012 I CELEBRATE 10 YEARS
5/12/2012 BeganTaxotere/ Herceptin is my next miracle for new node progression
6/28/12 Stopped Taxotere due to pregression, Started Perjeta/Herceptin

A LINK TO A STORY IN SHEILA'S OWN WORDS:

http://rushinperson.rush.edu/2011/02/16/cancer-survivor-rush-patient-feels-truly-blessed/

01 February 2012

American Beauty Cake - Project Pastry Queen


It is my turn again to be the host for this week's Project Pastry Queen. Looking through the remaining recipes, I chose the American Beauty Cake. Since Valentine's Day is just around the corner. The cake can be made ahead and kept frozen for up to 3 weeks. (At this point in my life, I need all the "do-ahead" recipes I can find!)

It's also similar to another cake I've made that my family LOVES, Triple Chocolate Mousse Cake (TCMC) from America's Test Kitchen, and I wanted to see how it compared. They both start with a flourless cake that is very dense, but oh so delicious. The top layer for this cake is a light and airy milk chocolate mousse. The middle layer of the TCMC is a little denser and it also has a third layer that is a very light, white chocolate mousse.

Since my TCMC recipe called for using a 9" spring form pan, I decided to use that for this one as well - instead of the 9" cake pan the recipe called for. I'm glad I did because the sides of my spring form pan are taller and I only had about 1/8" to spare once both layers were in there. It was also much easier removing the cake in order to glaze it. There was no need to invert it onto a plate and invert it again to my serving plate.

  Before and After Glazing

I was pleased with how the first layer turned out. With the TCMC cake, it always pulls away from the sides of the pan no matter what I do. The instructions for this cake called for baking it in a water bath, so perhaps that was the difference. One other big difference is this cake is served frozen, where the Triple Chocolate Mousse Cake only needs to be refrigerated.

Cooking Notes:
  • Your prepared pan will need to fit into a larger roaster or baking pan that will be filled with water.
  • Melt the milk chocolate over simmering water NOT BOILING, or it will seize up on you. You must watch it constantly, and even then mine seemed a bit thick but it was fine once I stirred in the egg yolk mixture.
  • You need to plan ahead because the cake must be frozen for at least 6 hours before you can glaze it.
  • When removing the cake to glaze, first run a knife around the outer edge to free it from the sides. Dip the bottom of the spring form pan into hot water to loosen. THEN release the spring on the side of the pan and the cake should come free.
I'm sure this cake is delicious because of the sampling I did before cleaning my pans. The true test will come on Valentine's Day . . . if I can wait that long!!

Be sure and check out the other members' version of the cake here:


I melted white chocolate and piped the swirls onto some
parchment paper. They were easy to remove and place on the cake.

AMERICAN BEAUTY CAKE: (yields 14 to 16 servings)
Adapted from The Pastry Queen by Rebecca Rather

Cake:

1 cup (2 sticks) unsalted butter
12 ounces premium-quality bittersweet chocolate, chopped into small pieces
6 large eggs
1 cup sugar
1 tablespoon vanilla extract
2 tablespoons dark rum, such as Myers's or the liqueur of your choice, such as Kahlua or Grand Marnier (optional)

Milk Chocolate Mousse:

1/4 cup unsalted butter
10 ounces premium-quality milk chocolate
3 large eggs, separated
3 tablespoons sugar
1 tablespoon vanilla extract
1 cup chilled heavy whipping cream

Dark Chocolate Glaze:

4 ounces premium-quality bittersweet chocolate, chopped into small pieces
1/4 cup light corn syrup
1/2 cup heavy whipping cream
1 1/2 teaspoons vanilla extract

Instructions:

TO MAKE THE CAKE: Preheat the oven to 350 F. Line the bottom of a 9" spring form cake pan with a parchment paper round and coat evenly with cooking spray. Melt the butter and chocolate in a metal bowl set over a medium saucepan with 2 inches of simmering water. Stir until smooth. Remove the bowl from over the saucepan. Whisk the eggs and sugar in a separate large bowl. Whisk the chocolate mixture into the egg mixture until well combined. Stir in the vanilla and rum.

Pour the mixture into the prepared pan and place it in a larger roasting or baking pan. Fill the larger pan with enough hot water to come about two-thirds of the way up the sides of the cake pan. Bake for 35 to 40 minutes. The cake is done when it is firm to the touch. It will rise while baking and settle down to its original size when removed from the oven. Cool the cake COMPLETELY in the pan on a rack.

TO MAKE THE MOUSSE: Melt the butter and milk chocolate in a metal bowl set over a saucepan of simmering water. Set the chocolate mixture aside to cool. Using a mixer or whisk, beat the egg yolks and sugar until smooth. Stir in the vanilla. Combine the egg yolk mixture with the chocolate mixture. In a clean bowl, beat the egg whites on high speed using a mixer fitted with a whisk attachment until shiny, stiff peaks form. Fold the egg whites into the chocolate mixture, one-third at a time, using a large rubber spatula. Using a mixer fitted with a whisk attachment, whip the cream on high speed just until soft peaks start to form. If you beat the cream more, the mousse will get lumpy. Gently fold the whipped cream into the chocolate mixture.

Spread the mousse over the cooled cake, filling the pan to the top. Wrap with plastic wrap or aluminum foil and freeze at least 6 hours and preferable overnight.

At this point the cake can be kept in the freezer for up to 3 weeks.

TO MAKE THE GLAZE: Place the chocolate in a medium mixing bowl. Combine the corn syrup, cream, and vanilla in a saucepan; bring to a boil. Immediately pour the cream mixture over the chopped chocolate and whisk until smooth. Keep the glaze at room temperature to ensure that it will pour. If the glaze is too thick, add more cream.

To assemble the dessert, remove the cake from the freezer. Run a knife around the inside edge of the pan. Dip the bottom of the pan in hot water to loosen, then release the side. (If using a regular cake pan, invert the cake onto a plate, then invert again onto a serving plate so that the mousse is on top). Pour the glaze over the mousse, making sure it covers the sides. Let the glaze set at least 1 hour. Cover with plastic wrap and freeze until ready to serve. The dessert is best when removed from the freezer just a few minutes before cutting. if left at room temperature, it will begin to melt.

TIP: It is easiest to separate eggs when they are cold, but egg whites whip up best when beaten at room temperature. separate the eggs as soon as they come out of the refrigerator, then let the whites sit on the counter until they reach room temperature, abut 10 to 15 minutes. NOTE: the very young, the elderly, and anyone immuno-compromised should avoid eating raw eggs.

01 December 2011

Snow-Tipped Sand Tarts - Project Pastry Queen


It is my turn to host Project Pastry Queen this week. Since my pick fell just after Thanksgiving, and I LOVE Christmas cookies, I chose Snow-Tipped Sand Tarts. Living in Texas, this is the closest I will come to a white Christmas!!


This is an easy recipe - only 6 ingredients and no need to let the dough chill. The cookies turned out festive as well as delicious. You will need to use your stand mixer because the dough gets pretty stiff at the end. The hardest thing was chopping up the pistachios. Don't try to chop them in a food processor, they end up too fine. Also, don't use ones that are already shelled - they are too salty and dark from roasting. The pistachios you shell yourself retain their pretty green color. I relied upon one of my favorite kitchen tools: an "Ulu"! This was a gift to us from my husband's parents that they brought back from an Alaskan cruise. Similar to an Italian mezzeluna, it does wonders on herbs & nuts.


The recipe calls for rolling the dough into 2" long, 1/2" logs. After the first batch, I felt they were a bit small. I changed that to 2 1/2" long, 3/4" logs and still ended up with more than 5 dozen cookies. After the cookies have cooled, they are dipped in white chocolate and rolled in chopped pistachios. For optional color, I also chopped up some dried cranberries. Be careful with the white chocolate - it has a very low melting point. The bowl your chocolate is in should not touch the water AND make sure the water is simmering, NOT boiling away madly. Otherwise it will turn into a globby mess!

I wasn't sure if I was going to dust the sand tarts with powdered sugar, but I am glad I did. Here are some before pictures:


These are sure to become a family favorite. I definitely recommend dusting them with powdered sugar. I wasn't sure it would stick after the cookies had cooled, but it did! ENJOY!!


Be sure and check out the other members' version of the Sand Tarts here:

Snow-Tipped Sand Tarts:

Ingredients:

2 cups (4 sticks) unsalted butter, at room temperature
1 1/3 cups powdered sugar, plus extra for dusting (optional)
2 tablespoons almond extract
4 cups all purpose flour
3 cups shelled, coarsely chopped pistachio nuts
8 ounces white chocolate
(I also use 1/2 cup chopped dried cranberries)

Directions:

Preheat the oven to 325° F. Line baking sheets with parchment paper or silicone mats, or grease generously with butter or cooking spray. Using a mixer fitted with a paddle attachment, cream the butter and the 1 1/3 cups powdered sugar in a large bowl on medium speed until light and fluffy. Add the almond extract and beat until combined. Stir in the flour until combined. Stir in 2 cups of the pistachios. (I used 1 1/2 cups).

Roll the dough into 2-inch-long, 1/2-inch logs (I did 2 1/2"-long, 3/4" logs) and shape each log into a crescent. Arrange the crescents on the prepared baking sheets about 1 inch apart. (They spread minimally.) Bake for 20 minutes, just until light golden brown. Cool the cookies for 15 to 20 minutes before removing from the baking sheet. Transfer to racks to cool completely.

Chop the white chocolate coarsely and place it in a medium bowl set over a saucepan with 2 inches of simmering water. Stir until the chocolate has melted. Dip the end of each cooled cookie in the melted white chocolate and immediately roll the chocolate-covered part in the remaining 1 cup pistachios (and/or chopped, dried cranberries). Place the dipped cookies on waxed paper. Use a small fine-mesh sieve to sprinkle powdered sugar over the portion of the cookies that have not been dipped in chocolate.

The chocolate will harden in about 45 minutes at room temperature or 10 minutes in the refrigerator. The cookies will keep in an airtight container about 4 days.

11 October 2011

Curried Butternut Squash Soup - Project Pastry Queen


I was hesitant about the recipe choice for this week's Project Pastry Queen. Curried Butternut Squash Soup was chosen by Josie at Pink Parsley. Head on over there for the recipe. Given the huge health benefits of butternut squash though, I decided to give it a try.

It is only been in the last 5 years that I have added sweet potatoes to my "Like" column. I never cared for the marshmallow, brown sugar version that is offered up at Thanksgiving. <<UGH>>!!! After I discovered their savory side, I now love them - especially roasted with rosemary and a touch of olive oil. Butternut squash falls into that same category. I haven't been a fan of most recipes I have tried. I'm also not a fan of the curry powder that is called for in the recipe. I thought of leaving it out, but I'm glad I didn't. I omitted the honey and cut the cinnamon in half. Next time I will leave it out and perhaps add in some rosemary.

Like most soups, this recipe is quick and easy to throw together - especially when you buy the squash already peeled and cut into cubes. (I HIGHLY recommend this!)

Like many soups, saute some onions and carrots in olive oil or butter.

Add the cubed squash, russet potato, and the spices.

Add chicken stock, milk and cream (optional). I used less than 1/2 of the cream that was called for, and compensated with extra milk. .

Bring to a boil and simmer for 45 minutes.
I used my immersion blender to puree the soup,
but you could use a regular blender as well.

Serve with a dollop of light sour cream and a sprinkling of paprika.

This was a very tasty soup and I WILL make it again. It was nice that we had a little rain (finally) in Austin over the weekend, so it even seemed like fall - perfect soup weather! Check out the results from the other PPQ members here! Some roasted the squash before making the soup, sounds like something I will try the next time.


09 October 2011

Tuxedo Cake - Project Pastry Queen


Not only is this Tuxedo Cake the reason I found Project Pastry Queen, it is why I bought Rebecca Rather's cookbook "The Pastry Queen" in the first place. Needless to say, I was THRILLED when Shawnda chose this as her selection, you can find the complete recipe and a gorgeous picture at her site. The cake tastes even better than it looks. Unless I am pressed for time, this will be my go to Chocolate Cake from now on . . . so long cake mixes!!

Franklin, my "Tuxedo" cat.
No, he did not get my last piece of cake!!
(Don't ask how long it took to get this photo)


Even though I've owned the cookbook for at least 6 years, I have never made this cake. The picture makes it look like one of those elegant, yet difficult desserts to make. I shouldn't have been intimidated because it was not complicated at all. I chose to make the cake using two 10-inch round cake pans, but it can also be made with three 9-inch pans. The whole thing came together by hand, it was kind of nice not using my stand mixer.

Two sticks of butter are melted in a saucepan, and then water and canola oil are added. Sugar, cocoa powder and flour are sifted together with a whisk. The butter mixture is whisked into the dry ingredients until smooth. 

Eggs are whisked in, one at a time

Whisk in buttermilk, and then add baking soda, salt and vanilla

The batter is then poured into your prepared pans. I saw a post of Shawnda's for Fresh Strawberry Cake. She suggested wrapping the sides of your cake pans with aluminum foil - "it would keep the batter near the edge of the pan cooler for longer so the cake baked more evenly". I've never done this, but decided to give it a try.

I was VERY HAPPY with the way they turned out. Thanks Shawnda!!

The cakes must cool completely, at least 2 hours before frosting. The frosting is made by whipping cream to the soft peak stage and then stirring in the powdered sugar. Once frosted, the cake needs to be refrigerated for at least 1 hour.

The chocolate glaze is made with bittersweet chocolate, whipping cream and something called "Lyle's Golden Syrup". This is imported from Britain, and if you can't find it in your grocery store, here is the link to a substitution. The substitution suggests a combination of light corn syrup and molasses. I found something called "Brer Rabbit Syrup", imported from Britain, ingredients - corn syrup and molasses. GREAT, I thought, but once I tasted the chocolate glaze on the cake, I did not like it. Next time, I will substitute with light corn syrup only!!


Once the glaze has cooled for 10 minutes, slowly pour it over the cake - covering the top and letting it drizzle down the side. Refrigerate for at least 1 hour. I made this cake for the Midweek Connections supper at our church, it was a huge hit. I barely had time to rescue a piece to take home with me for a picture.


08 October 2011

2010 Mamma Jamma Ride

It's been awhile since I have posted anything, but it's that time of year - Mamma Jamma time! I have been busy fundraising for my favorite cause. The ride was a week ago, and it was a fabulous day.

If you have read about my own breast cancer story, you might remember how much the Inaugural Mamma Jamma Ride in 2009 meant to me. I will be writing about this year's ride soon, but first I wanted to put up pictures from last year. I've got a lot of posts to catch up on for Project Pastry Queen, and Midweek Connections, amongst others. In the meantime, enjoy what the 2010 Mamma Jamma Ride had to offer. Every rider raised at least $500 to provide services and support for Breast Cancer patients, the ride is their reward!!

Morning dawns at Reunion Ranch. A great day awaits as the
2010 Mamma Jamma Ride is about to begin.

Riders begin to arrive. I love the tire tracks in the dew laden grass.

More bikers gathering, what a beautiful morning!

Leah, myself and Andrea

Thank you David C. Smith, Executive Ride Director, 
for all of your hard work to make this ride happen!

My Hubbie, Mark (# 417), walking his bike over to the starting line

It's almost 8:30, rollout time.
Riders had a choice of 13, 27, 46, 70 & 100 miles.

READY . . .

SET . . .

GO!!!!
Those are the wonderful SAG vehicles lined up and ready to support the ride!

430 riders - raised over $400,000 to support Breast Cancer Patients.
Now it's time to enjoy the Texas Hill Country on this tree lined country road!

Heading into the mighty metropolis of Andice, TX.

The sign said "Ride Single File" - riding safely is a Good Thing!

It's hard to get a good picture of the beautiful scenery
while you are pedaling your bike.

MARK . . . WAIT UP!!!

About to go downhill, my favorite thing to do.
Better put the camera away :)

I love this old bridge, just outside of the mighty metropolis of Joppa, TX.

Lunch stop at Joppa, TX

Joppa was Hoppin'

This is my bike - ArVi
I named it after my Dad - ARt and my mom VIrginia.
That way I have them with me whenever I go out for a ride.

Bikes and their saddles patiently waiting for their owners
to mount up and head out on the road again.

Lunch was great - delicious wraps, fruit and OREOS!

The 46 milers on our Gethsemane Lutheran Team.
 Fifteen more miles to go.

I can't believe how green the grass was in 2010 compared to this year.

It was so good to ride with teammates Susan & Jane.
Memories for a lifetime!

Finish line in sight . . .

46 miles - check
A great day spent with good friends - check
Fundraising Goal met - check
Thousands of Breast Cancer patients will have life saving services - PRICELESS

David -ride director, and husband Mark - HEROES!!

Cancer can sometimes give you a gift. These are 2 of my favorites!! We were the top 3 fundraisers for the 2010 Mamma Jamma Ride. It is our passion.

At the Awards Party

When all was said and done with, after fierce competition with my friends Jan and Kerry, I ended up with the Top Fundraiser-Rider Award for 2010. Our team also ended up with the Top Team Fundraiser Per Capita Award. My total for the year was $12,756. Our team ended up raising a little over $20,000. Much would be accomplished in our local Breast Cancer community because of the Mamma Jamma ride. I'm so very proud to be a part of it.

Finally, here is a video that was made of the ride last year, to promote the 2011 Mamma Jamma Ride: